Most people show up at a campsite in the last hour of daylight, scramble through a bag of mystery poles, argue about which end is which, and end up with a lopsided tent nobody wants to sleep in. I have done it that way. It is not fun. After about a dozen trips with the Coleman Montana 8-person tent, I figured out a sequence that gets it standing in under 20 minutes, even when my wife and kids have wandered off to collect rocks or find the bathroom. This guide walks you through that exact sequence.
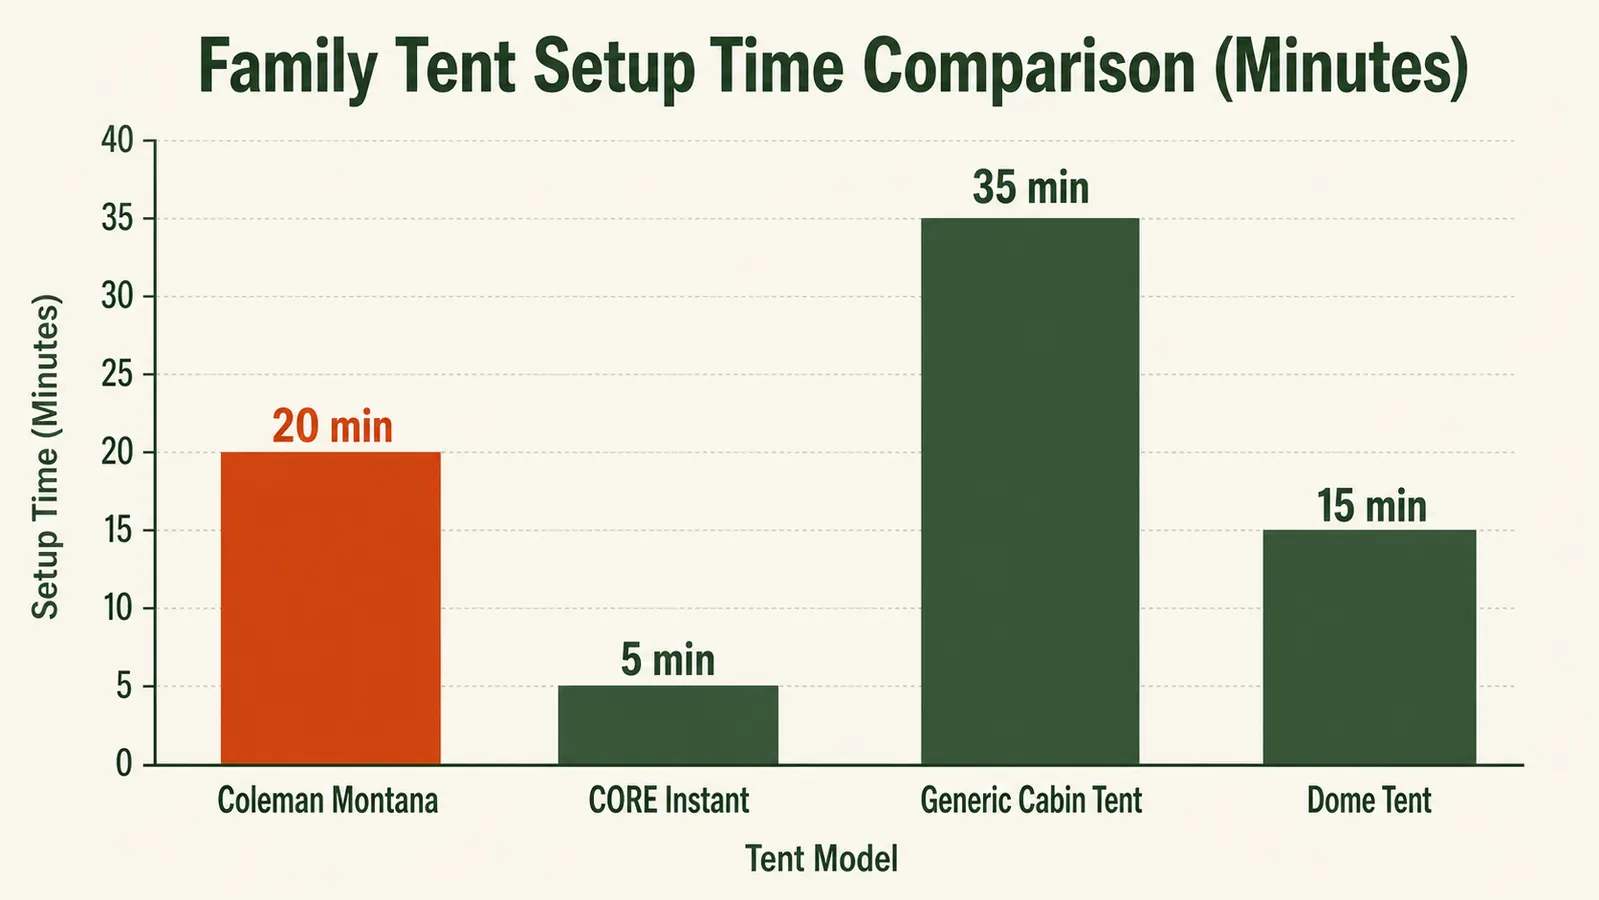
The Coleman Montana is a big tent: 16 by 7 feet, nearly six feet at the peak. It is not the kind of tent that pops up in 60 seconds. But it is also not complicated if you attack it in the right order. The setup issues most people run into are not about the tent being difficult. They are about doing the right steps in the wrong sequence. Follow these five steps and you will stop wrestling with it.
Before you start: make sure you have the right tent for the job
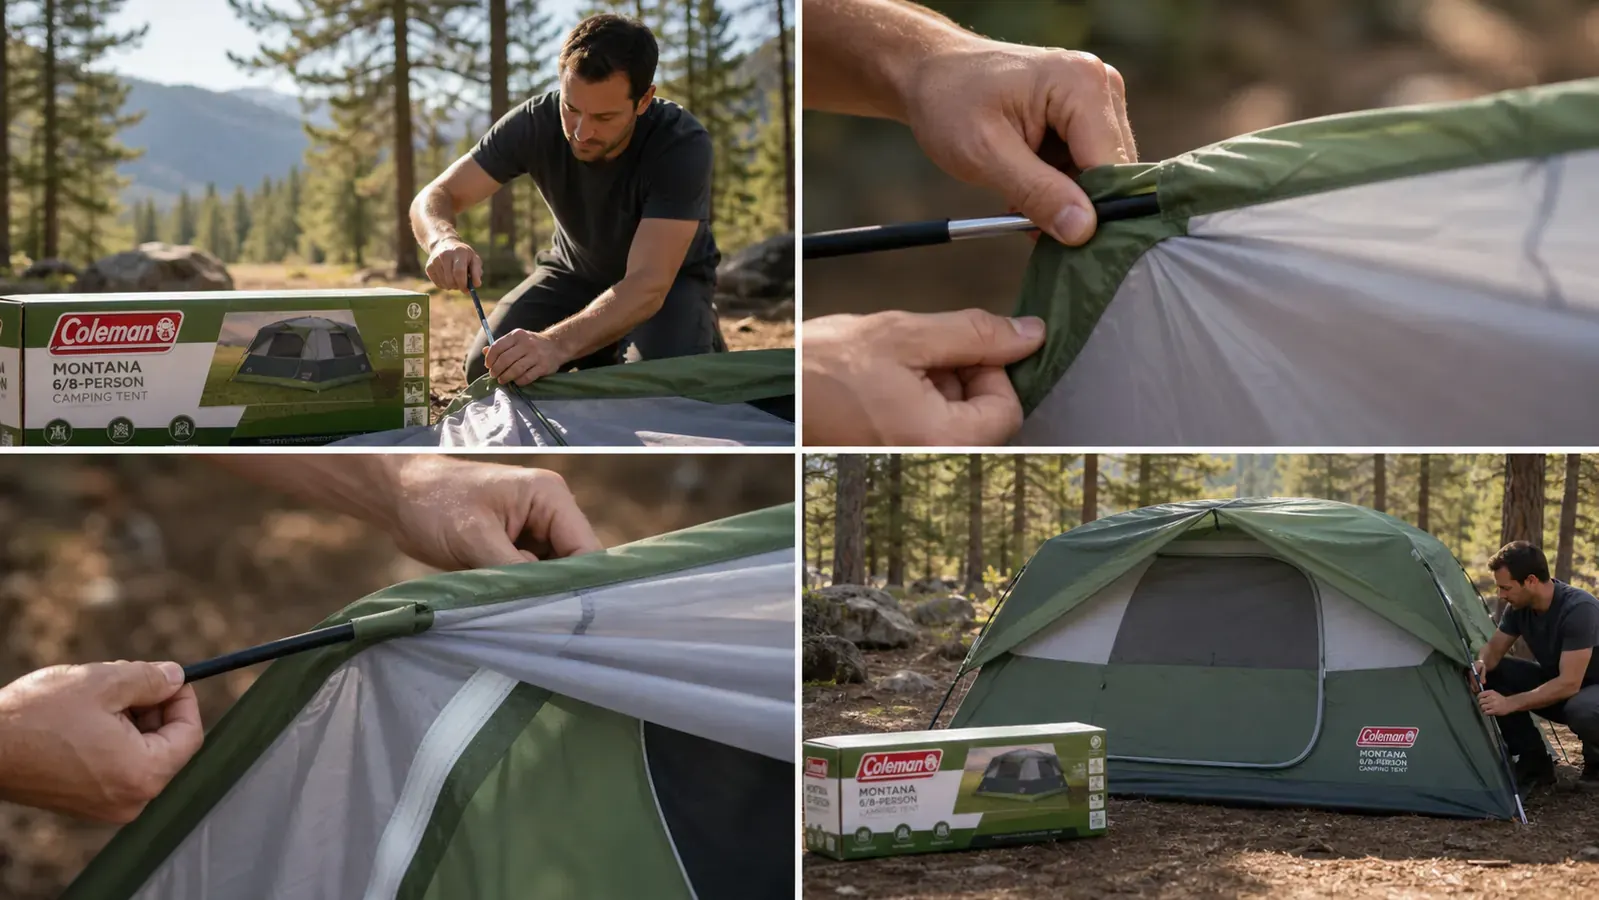
The Coleman Montana 8-person tent (ASIN B00J955FG6, 4.4 stars from 4,590 campers) is the tent this guide is built around. If you are still shopping, check the current price before your next trip.
Amazon Check Today's Price on Amazon →Step 1: Pick Your Spot and Lay the Footprint Before You Touch the Bag
This sounds obvious, but most setup problems start here. Walk the site before you unpack anything. You are looking for a flat patch at least 17 feet long and 8 feet wide with no roots or rocks that will jab someone in the back at 2 a.m. Avoid low spots where water pools if it rains. At Rocky Mountain campsites, I have learned to avoid setting up directly under large pine trees: the drips from needles after a shower are relentless.
Once you have your spot, lay out the footprint if you brought one. Coleman does not include a footprint with the Montana, but a cheap polyethylene tarp cut to size works fine. If you are skipping the footprint, just clear any sharp debris with your foot before unrolling. Unroll the tent body flat on the ground in the orientation you want the door to face. I always face the door away from prevailing wind and toward my fire ring when possible.
Take two minutes here to get the orientation right. Repositioning a half-assembled tent is annoying. Repositioning a fully staked tent in the dark is genuinely awful.
Step 2: Assemble and Thread the Poles While the Body Is Still Flat
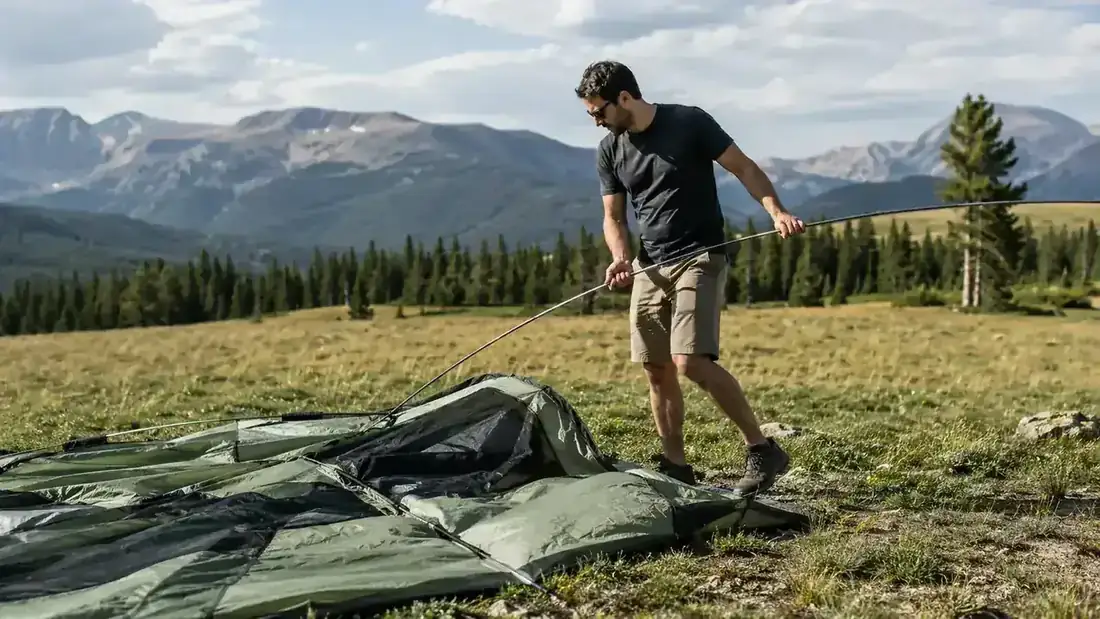
The Coleman Montana uses a color-coded pole system: the two longer poles are the main cross-poles that form the cabin shape, and the shorter straight pole handles the front awning vestibule if you choose to use it. Lay all the poles out beside the flat tent body before you feed any of them through anything. It takes 90 seconds and saves you the classic move of threading the wrong pole halfway before realizing it.
Feed the first long pole through the sleeve along the length of the tent body. The poles are shock-corded, so they self-connect as you push them through. Start from one end and push toward the other, keeping gentle pressure so the segments do not buckle sideways in the sleeve. Then do the same for the second long cross-pole. These two poles form the X shape that lifts the tent into a cabin profile.
The pole sleeves on the Montana are wide enough that one person can handle this without a partner. When I do it solo, I sit at one end, push the pole through from that end, then walk to the other end and pull it through. No need to fight it.
Step 3: Stand the Frame and Clip the Tent Body to the Poles
With both poles threaded, bend each one into an arc by connecting the pin ends into the grommets at each corner of the tent floor. This is the step that physically lifts the tent off the ground. Start with one corner, pin it, cross to the diagonal corner, pin that, then do the other two corners. The tent body should now be standing in a rough cabin shape.
Once it is standing, walk the perimeter and attach every tent clip to the poles. The Montana uses plastic snap clips along the pole shafts. Click each one closed as you go. This is the step people rush and regret. If you leave clips unconnected on the windward side, that side of the tent sags and you lose headroom along that wall. Takes about three minutes to clip all of them fully.
If you are setting up solo and the tent wants to shift or fold while you are connecting corner pins, stake one corner pin lightly with a single tent stake before walking to the diagonal. The slight tension holds the tent in place while you work.
Most setup problems are not about the tent being hard. They are about doing the right steps in the wrong order. Get the sequence right once and you will never fight it again.
Step 4: Stake All Corners and Guy Lines Before Touching the Rainfly
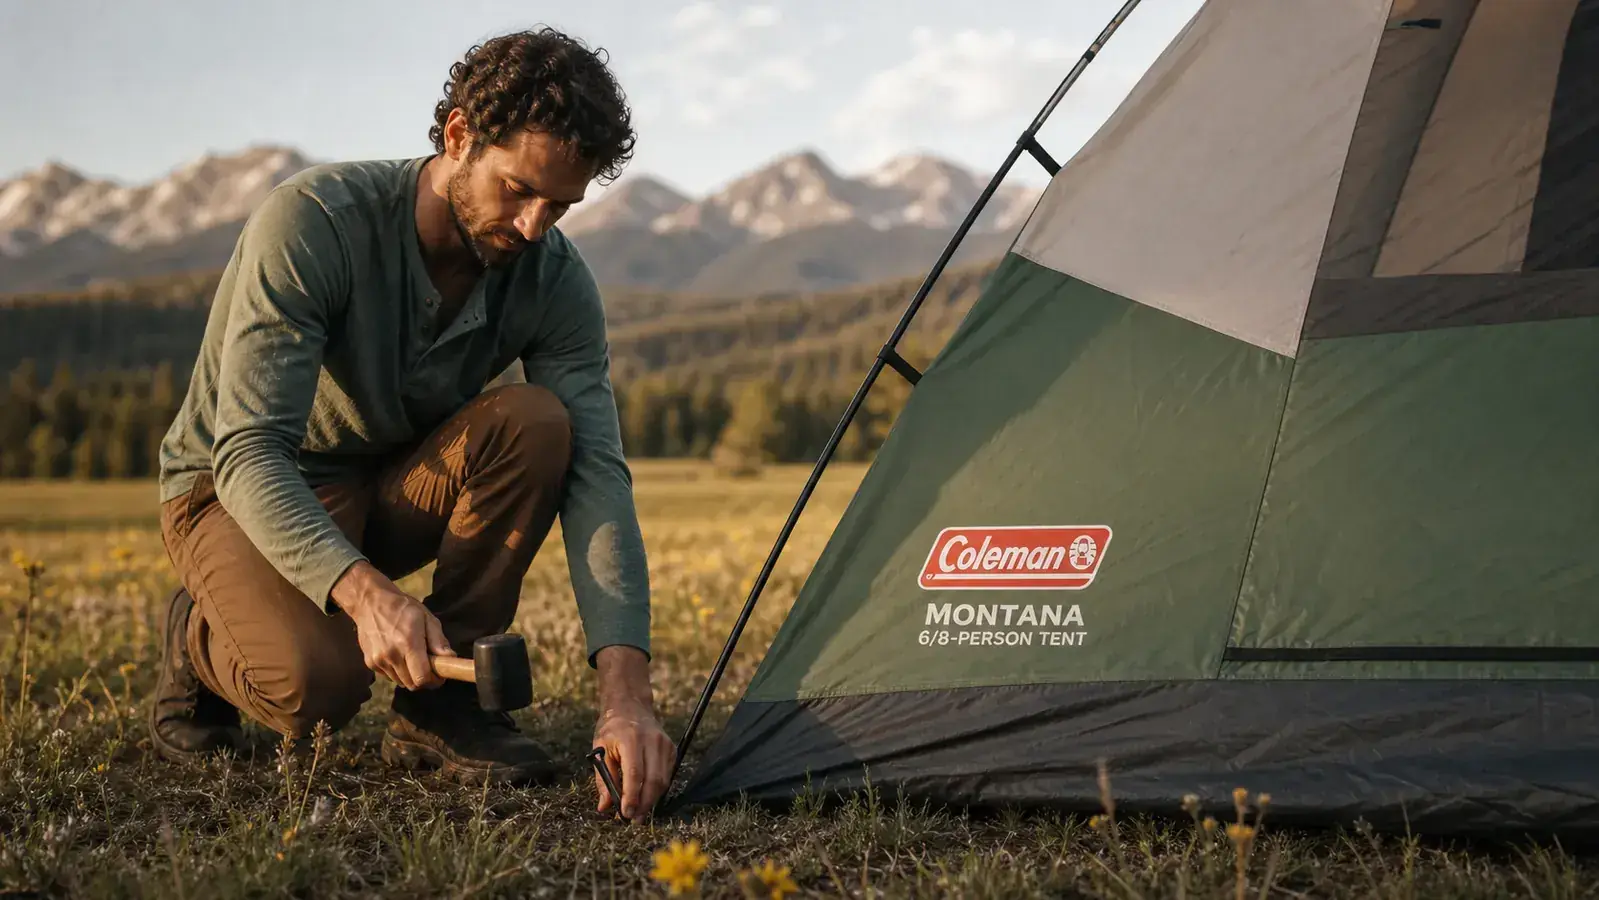
Stake the four main floor corners first. The Montana comes with steel stakes that hold reasonably well in hard ground. Use a mallet or the flat of a rock if you do not have one. Drive them at a 45-degree angle away from the tent, not straight down. Straight-down stakes pull out in wind. Angled stakes hold.
After the corners are in, stake any guy lines from the pole peak points. The Montana has two of these, one at each end, and most people skip them. Do not skip them. In Colorado, afternoon thunderstorms come fast and the wind ahead of them is strong. A big cabin tent with no guy lines is a sail. I skipped the guy lines on a trip to Eleven Mile State Park and spent 20 minutes holding the tent down from inside while a storm rolled through. Never again.
Total time for staking: four to five minutes if you have a mallet. The ground condition matters a lot here. Rocky soil takes longer. Soft sandy soil is easy but upgrade to longer stakes if you have them. The included stakes are fine for most established campgrounds.
Step 5: Attach the Rainfly Last, Cinch the Velcro Straps, and Adjust the Vents
The rainfly goes on last, after the tent is staked. Drape it over the tent body so the fly door panels align with the tent doors. The Montana's rainfly has color-coded pull tabs that correspond to buckle points on the tent frame. Clip each buckle, working your way around the tent. There are also velcro attachment straps at the pole feet: wrap those around the pole ends and press the velcro closed. This keeps the fly snugged tight against the tent body in wind.
Once the fly is on, open both roof vents. The Montana has two mesh vents at the top of the fly that stay open even in rain. Most people leave these closed because they do not notice them. Open vents reduce condensation dramatically overnight. On a cool Colorado morning after a night with closed vents, you can end up with visible moisture dripping from the ceiling. On the same night with vents open, the inside stays dry.
Do a final walk-around. Check that the rainfly overhang is even on all sides, that no tent body fabric is exposed to rain gaps, and that all guy lines have at least some tension on them. Pull the fly door zippers to make sure the doors open cleanly. The whole process from unrolling to finished should be 15 to 20 minutes once you have done it a couple of times.
What Else Helps: Gear That Makes Setup Easier
A rubber mallet is the single biggest quality-of-life addition to tent setup. The Coleman Montana comes with steel stakes that need real force in hard ground, and using a rock or your boot is slow and hard on the stakes. A cheap rubber mallet from any hardware store costs a few dollars and fits easily in the gear bin.
A tent footprint or cut tarp protects the floor fabric from ground abrasion and adds another layer against moisture wicking through. You do not strictly need it at a manicured campground, but it extends the life of the tent floor significantly. I use a 4mm polyethylene sheet cut slightly smaller than the tent floor so water cannot pool underneath it if it rains hard.
If you camp regularly, a small headlamp keeps both hands free when you are staking in low light. The whole setup process described above works fine in daylight. In dimming conditions, a headlamp means you do not rush the staking and guy lines because you are losing visibility.
For more on why the Montana is worth choosing over comparable options, see my full two-season write-up in the Coleman Montana tent review. And if you are debating whether a cabin tent like this is the right format for your family at all, the 10 reasons cabin tents beat dome tents piece lays out the tradeoffs clearly.
The Coleman Montana is the tent this guide was built around
4.4 stars, 4,590 reviews, and a straightforward setup once you know the sequence. Check the current price on Amazon and see if it is in stock for your next trip.
Amazon Check Today's Price on Amazon →