I have been camping in Colorado for over fifteen years and I have been genuinely cold exactly twice. Both times were my own fault, and both times came down to the same three mistakes: wrong bag, no sleeping pad, and a campsite that collected cold air like a bowl. None of those problems required expensive gear to fix. They required knowing what actually matters.
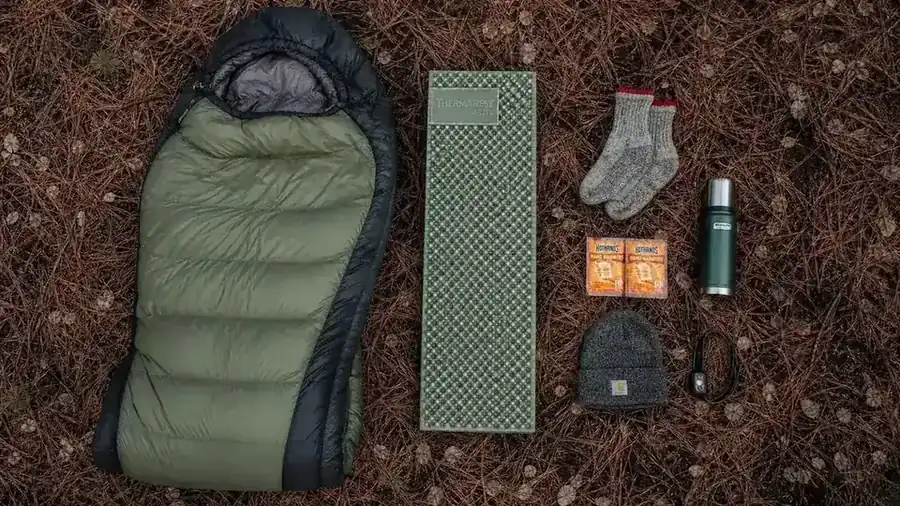
If you have ever woken up shivering at 3am and counted the hours until sunrise, this guide is written for you. I am going to walk through the five steps I use every time I camp in temperatures below 35 degrees. The recommended bag for this system is the TETON Sports TrailHead mummy bag, which runs under $70 on Amazon and has a 20F comfort rating that I have personally verified in Colorado high-country conditions. But the bag is only one piece of this. The other four steps are free.
Still cold at 2am? Your sleeping bag is probably wrong for the temperature.
The TETON Sports TrailHead mummy bag is rated to 20F and costs under $70. Over 1,700 campers have reviewed it. Marcus uses it in the Colorado mountains every fall.
Amazon Check Today's Price on Amazon →Step 1: Match Your Sleeping Bag to the Real Temperature, Not the Forecast High
Most people look at a weather app, see a low of 38F, and grab a 35F bag. That works until you are camped at 9,000 feet, a front pushes through at midnight, and the actual low hits 26F. Temperature ratings on budget sleeping bags are already aggressive. A bag rated to 35F by a manufacturer using the EN 13537 comfort standard might keep you alive at 35F but you will not sleep. Always buy a bag rated 10 to 15 degrees below your expected low.
The TETON Sports TrailHead is rated to 20F. That sounds like overkill for a 38F night, but in practice it means you sleep comfortably at 28F and you have margin when the weather surprises you. I have used this bag on trips ranging from 22F to 50F. Below 40F I zip it fully and cinch the hood. Above 45F I unzip it to the waist and use it like a quilt. A good cold-weather bag gives you range. A bag rated exactly to the temperature gives you nothing if the temperature drops.
One more thing on bags: mummy shape is non-negotiable for cold camping. Rectangular bags let air pool around your feet and legs, and your body has to heat all that dead air volume all night long. A mummy bag wraps close to your body and you are only heating the air between you and the bag shell. That is a massive efficiency difference. If you are currently sleeping in a rectangular bag at temperatures below 45F, switching to a mummy bag alone might solve your cold-night problem without changing anything else.

Step 2: Put R-Value 4 or Higher Under You, Not Just a Tent Floor
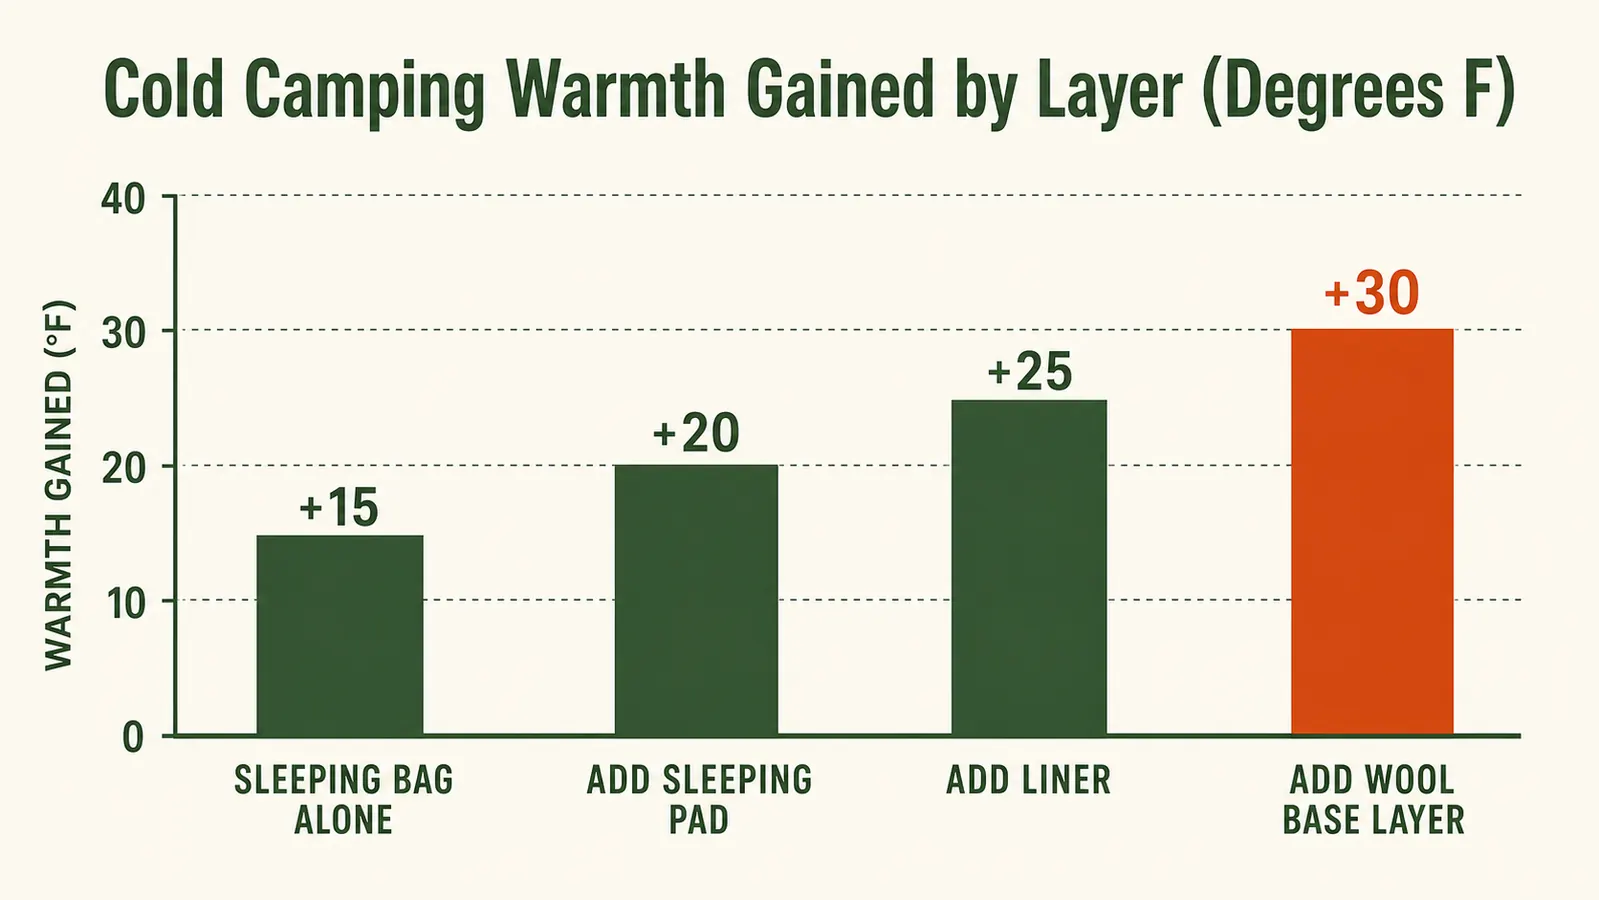
Ground conduction kills more camping nights than wind, rain, or cold air combined. Dirt and rock pull heat out of your body at roughly 25 times the rate that still air does. Your sleeping bag does almost nothing on the bottom because the insulation compresses under your weight and loses its loft. The only thing standing between you and a cold ground is your sleeping pad.
For cold-weather camping, you want a sleeping pad with an R-value of at least 4. Closed-cell foam pads (the accordion-style ones like a Therm-a-Rest Z Lite) get you to R-2 and cost around $40. Stacking two of them gets you to R-4. An inflatable pad with good insulation hits R-4 to R-6 in a single pad. I personally use a foam pad as a base layer with an inflatable on top for trips below 30F. It is the single highest-return gear change I have ever made for cold camping, and it costs less than $80 total.
If you are on a tight budget and can only fix one thing, fix the pad before you fix the bag. Most people do it backwards. They spend $200 on a warmer bag and sleep on the same old thin foam square. Their back is still cold all night because the bag is compressed against the ground and doing nothing.
Step 3: Layer Your Sleeping Clothes the Way You Layer for a Cold Hike
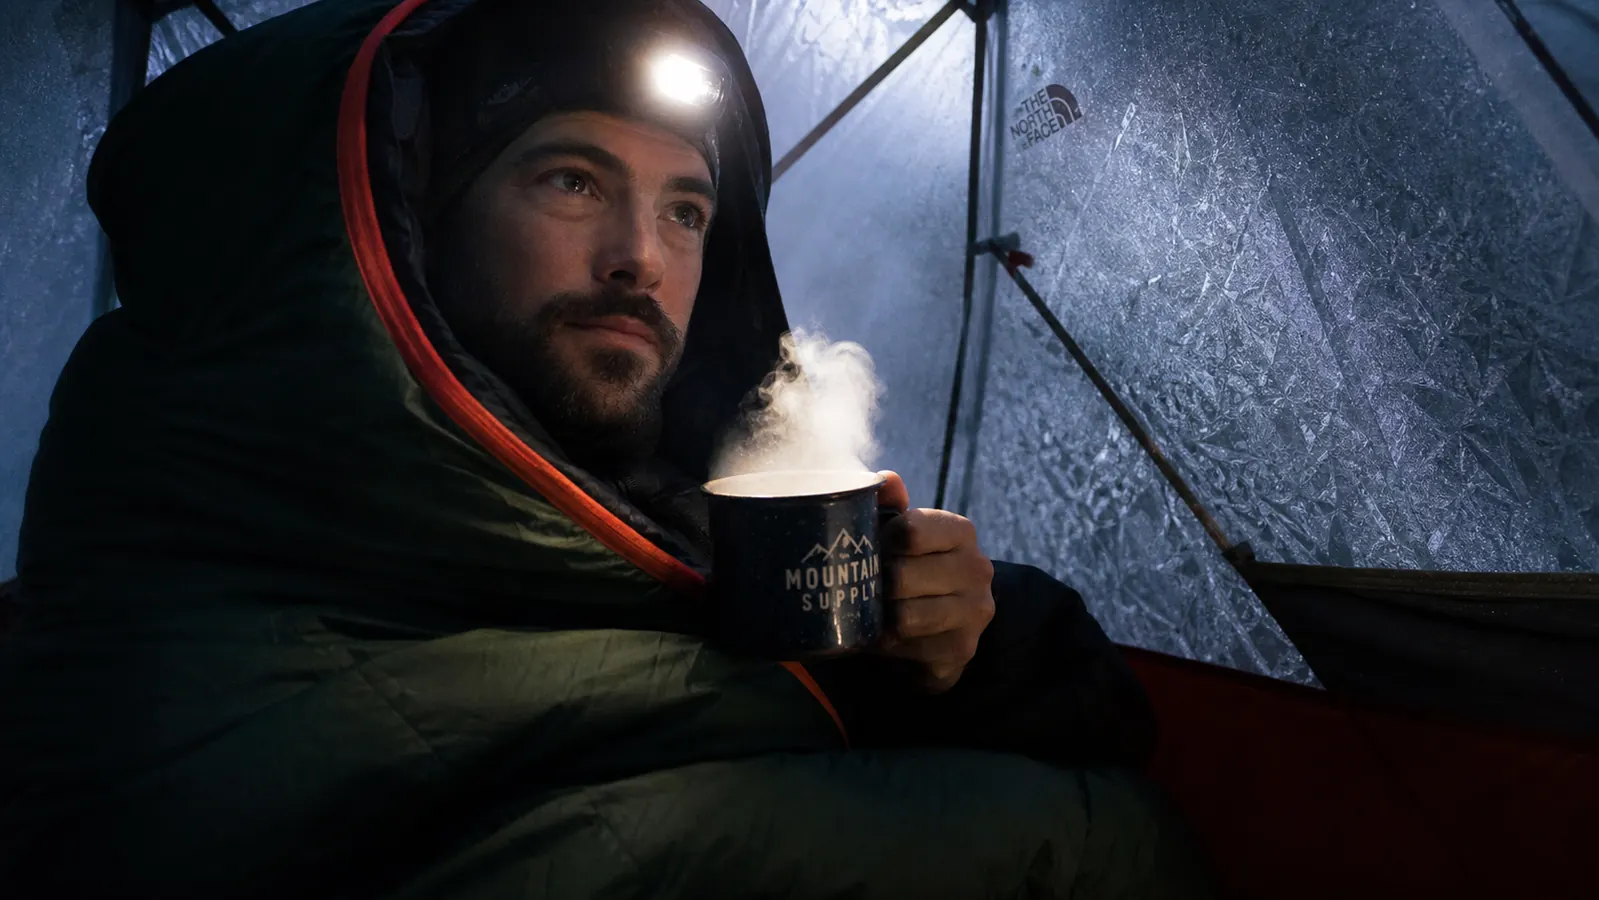
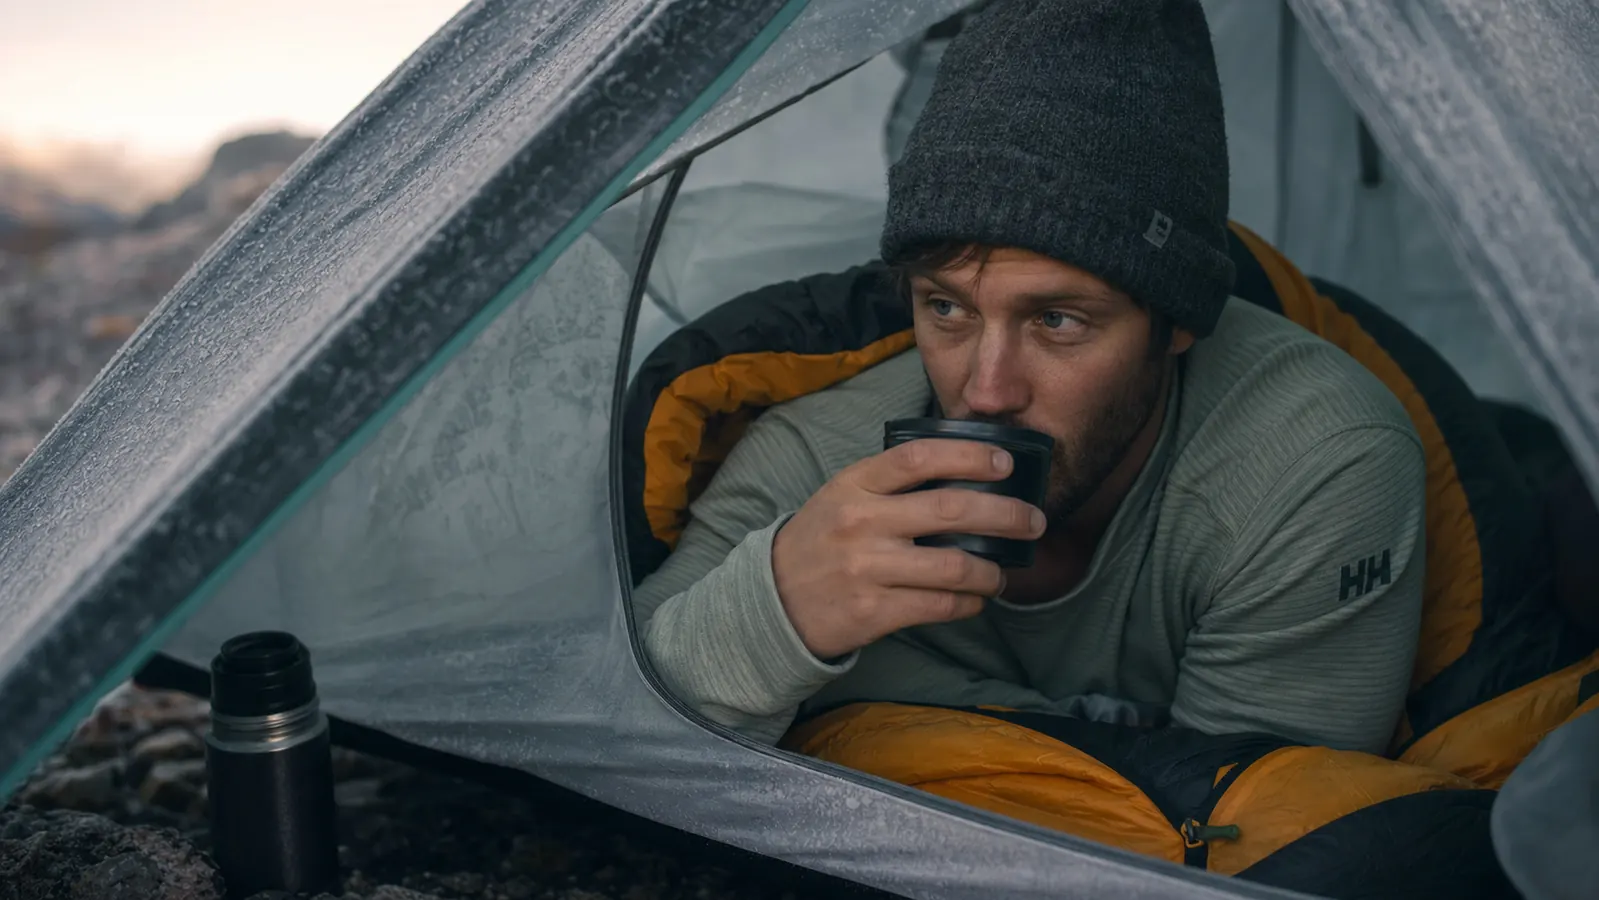
Your sleeping bag is not a heater. It traps the heat your body generates. If you get into it wearing sweaty cotton from the day's hike, you are trapping moisture and your body will spend the night fighting to stay warm instead of sleeping. Go into your bag in dry, clean layers.
My cold-weather sleep kit is: merino wool base layer top and bottom, wool socks (not the same ones I hiked in), a lightweight beanie, and light gloves if the temperature is below 28F. That is it. I do not sleep in a heavy fleece or a puffy jacket because I get too warm and then I wake up sweating, which leads to being cold again two hours later. Merino wool regulates better than synthetics for sleep because it moves moisture without feeling clammy.
One thing most guides skip: eat something calorie-dense before bed. Your metabolism generates heat when it is digesting. A handful of nuts or a small piece of chocolate 30 minutes before you sleep is a legitimate warmth strategy. It is not magic but it is real, and it costs nothing.
Your sleeping bag is not a heater. It traps the heat your body makes. If you climb in cold, it stays cold. The goal is to start warm and stay warm, not to warm up inside a cold bag.
Step 4: Use a Hot Water Bottle as a Foot Warmer
This is the trick that more experienced campers know and beginners never try. Before you get into your sleeping bag, heat water on your camp stove until it is just off a boil. Pour it into a hard-sided, leak-proof water bottle (a wide-mouth Nalgene or a stainless steel bottle both work). Tighten the cap fully and put the bottle at the foot of your sleeping bag before you climb in.
The bottle will stay warm for three to five hours depending on ambient temperature. Your feet are one of the hardest parts of your body to keep warm in a sleeping bag because blood flow to the extremities drops when your core is cold. Warm feet signal your nervous system that the environment is safe and your body relaxes into sleep instead of tensing up against the cold. In a TETON TrailHead bag with a hot water bottle at the foot section, I have slept comfortably on nights that hit 22F.
Do not use a soft plastic bottle. It can warp from the heat and the cap can fail if you bump it at night. Do not put the bottle directly against bare skin. If it just came off the stove, wrap it in a wool sock first. After an hour it will be warm-not-hot and you can let it sit loose at your feet.
Step 5: Pick a Campsite That Does Not Collect Cold Air
Cold air is dense. It drains downhill and pools in low spots, creek bottoms, meadow depressions, and valley floors. If you pitch your tent in a bowl-shaped clearing because it is flat and sheltered, you may be sleeping in the coldest spot on the entire mountain. This is called a frost hollow and temperatures inside one can be 10 to 15 degrees colder than the surrounding hillside.
Choose a site that is slightly elevated above the surrounding terrain, or on a gentle slope where cold air will drain past you rather than pool around you. A site near a large rock or a dense stand of trees on the windward side gives you wind protection without trapping cold air. Avoid setting up in the lowest visible point of a clearing, even if it looks like a perfect flat spot.
I once moved my tent 40 feet up a slope from where I had originally pitched it on a trip in the San Juan Mountains. The next morning a tent that stayed in the low spot had frost inside while mine had none. Same bags, same pads. Just campsite selection.
What Else Helps
A few additions that are worth mentioning without turning them into full steps. A tent with a low-profile, four-season or three-season design reduces wind chill on the tent walls, which matters when temperatures drop into the low 20s. A windproof tent does not need to be expensive: the Coleman Montana holds up in significant wind and I have used it down to about 25F without feeling drafty inside. Your tent is your shelter layer, and it matters more in wind than in still cold.
Hand warmers are a useful backup but they are not a system. If your bag, pad, and campsite are right, you will not need them. If those three are wrong, hand warmers just delay the problem. Use them as a supplement for early mornings when you are getting up before the temperature has risen, not as a substitute for doing the other steps correctly.
Internal links worth reading alongside this guide: the TETON Sports TrailHead sleeping bag review covers how the bag specifically performs at 20F in Colorado conditions, and the 10 reasons a mummy sleeping bag keeps you warmer article goes deeper on the thermal physics of bag shape and why the difference is bigger than most people expect.
The right bag makes steps 1 through 5 actually work together.
The TETON Sports TrailHead mummy bag is rated to 20F, comes with a stuff sack and liner, and costs under $70. It is the bag Marcus uses on Colorado high-country trips and recommends as the starting point for any cold-weather sleep system.
Amazon Check Today's Price on Amazon →